
I Created a Frankenstein Pear Tree 😳🍐
Discover the process of grafting different pear varieties onto a single tree and the exciting growth of my Frankenstein pear tree. Learn how to replicate this project in your garden!

At a glance
Key Takeaways

Grafting Maximizes Space
You can grow multiple varieties of fruit in a limited space.

Proper Timing is Crucial
Ensure you graft during the active growth phase of the tree.
Monitor Your Grafts
Regular checks are necessary to ensure successful growth.
Choose Quality Materials
Using sharp tools and healthy plant materials increases grafting success.

Be Patient
Grafting takes time; allow your plants to establish and grow.
Introduction
Have you ever dreamed of growing multiple types of fruit from a single tree? This is not just a whimsical idea; it's a horticultural reality achievable through the art of grafting. In this post, I'll share my journey of creating a Frankenstein pear tree by grafting different pear varieties onto a seed-grown pear tree. This project not only showcases the wonders of grafting but also provides practical steps for you to replicate this in your garden, allowing you to enjoy a diverse harvest from a single plant.
What is Grafting?
Grafting is a horticultural technique that allows you to combine the best traits of different plants. By grafting, you can:
- Maximize Space: Grow multiple varieties in a small area, making it ideal for gardeners with limited space.
- Enhance Flavor: Blend the best flavors from different varieties, ensuring a more delicious fruit experience.
- Improve Disease Resistance: Use a robust rootstock that can withstand soil-borne diseases, thereby increasing the longevity and health of your tree.
- Control Growth: Choose rootstocks that control the size of the tree, making it easier to manage in smaller gardens.
Grafting is not only a practical method to increase yield but also a fun and rewarding experience that allows for creativity in the garden.
Materials Needed
Before starting, gather the following materials:
- Grafting Knife: A sharp knife is essential for making clean cuts. Look for a knife specifically designed for grafting, as it will provide the precision needed for successful grafts.
- Grafting Tape: This will hold your grafts in place and help seal them to prevent moisture loss. You can also use parafilm or rubber bands as alternatives.
- Seedling Heat Mat: Helps maintain optimal temperatures for growth, especially during the early stages. This is crucial for successful healing of the grafts.
- Clear Nursery Pots: Useful for starting new grafts until they are ready for planting. They allow you to monitor root development and ensure proper drainage.
- Rootstock: The base tree onto which you will graft. Choose a healthy, vigorous pear seedling or young tree that matches the climate and soil conditions of your area.
- Scion Wood: Healthy wood from the pear varieties you wish to graft. Select scions that are about the same diameter as your rootstock for the best results.
- Pruning Shears: For trimming your scion wood and rootstock to the appropriate size before grafting.
Having the right materials is crucial to the success of your grafting project. Make sure everything is clean and sharp to prevent infections and ensure the best healing conditions.
Steps to Create Your Frankenstein Pear Tree
1. Start with a Seedling
Begin by growing a pear seedling. You can start from seeds or purchase a young tree from a nursery. If starting from seeds, soak them overnight in water to help with germination. Plant the seeds in a seedling tray or pots filled with quality potting soil and keep them in a warm, sunny location. Water them regularly to keep the soil moist but not waterlogged.
Once your seedling reaches a suitable height of about 12-18 inches, it's ready for grafting. Ensure that the seedling is healthy, pest-free, and has developed a strong root system.
2. Prepare Your Grafts
Select healthy scion wood from the pear varieties you wish to graft. The best time to collect scions is during the late winter or early spring when the trees are still dormant. Look for one-year-old wood that is about the same diameter as the rootstock. The wood should be flexible and have several healthy buds.
Once you have your scion wood, cut it into sections about 6-8 inches long, making sure each section has at least two buds. Wrap the scions in damp paper towels and place them in a plastic bag to keep them moist until you are ready to graft.
3. Make the Graft
Using your grafting knife, make a clean cut on the rootstock about 6 inches above the soil line. The cut should be at a 45-degree angle. Next, make a matching cut on the scion wood. There are several grafting techniques you can use, such as:
- Whip and Tongue Graft: This method is ideal for matching diameters. Make a long diagonal cut on both the rootstock and scion, then interlock them.
- Side Graft: Cut a notch in the side of the rootstock and insert the scion into the notch.
- Cleft Graft: This is useful for grafting larger scions onto smaller rootstocks. Cut a slit in the rootstock and insert the scion into the slit.
Regardless of the method you choose, ensure that the cambium layers of both the rootstock and scion are aligned. This is crucial for the successful transfer of nutrients and growth.
Once the graft is made, wrap it tightly with grafting tape to hold it in place. Make sure to cover the cut area completely to prevent moisture loss and infection.
4. Care for Your Grafts
Place your grafted tree in a controlled environment. Using a seedling heat mat can help maintain the temperature around 70°F to 85°F, which is essential for successful graft healing. Keep the grafted tree in a shaded area to prevent stress from direct sunlight.
Water the grafted tree regularly, ensuring the soil remains moist but not soggy. Overwatering can lead to root rot, while underwatering will stress the plant. Monitor for signs of growth, which may take several weeks.
5. Monitor Growth
After a few weeks, check the grafts for signs of growth. If successful, new buds will begin to emerge from the grafted scions. At this point, you can gradually introduce the grafted tree to more sunlight, moving it to a brighter location over several days.
Once the scions have established growth and show new leaves, you can begin to reduce the amount of grafting tape. This will allow the graft to breathe and encourage stronger growth.
Common Mistakes to Avoid
- Improper Timing: Grafting should be done during the tree's active growth cycle. Late winter or early spring is the best time for most pear varieties.
- Inadequate Sealing: Ensure that the graft is tightly wrapped to prevent moisture loss. An improperly sealed graft can dry out and fail.
- Neglecting Care: Regularly check your grafts for health and growth conditions. If you notice wilting or discoloration, take action immediately.
- Overcrowding: If you are grafting multiple varieties, give each graft enough space to grow. Crowding can lead to competition for nutrients and light.
- Ignoring Pests and Diseases: Monitor your grafted tree for pests and diseases. Early intervention can save your grafts and promote healthy growth.
By avoiding these common pitfalls and paying attention to the needs of your grafted tree, you can increase your chances of success.
Conclusion
Creating a Frankenstein pear tree is not just a fun gardening project; it’s a great way to explore the art of grafting and enjoy a diverse harvest. With the right materials and techniques, you can successfully graft different varieties onto a single tree and enjoy the fruits of your labor. This project not only enhances your garden but also allows you to experiment with flavors and varieties that you love.
As you embark on this grafting journey, remember that patience and care are key. Each graft is a new beginning, and with diligence, you will be rewarded with a fruitful tree that showcases your gardening skills and creativity. Happy grafting!
Photos from this idea
Helpful products for this project
These products were matched to the materials, tools, and care steps discussed in the article.
- Bare Essentials Living - White Kaolin Clay Powder (2 lb) 100% Natural White Powdered Clay for Seed Bombs, White Clay Mask, DIY Spa, Soap, Bath Bomb, Deodorant, Can be Used as Kaolin Clay for Gardening - View Product: 100% NATURAL WHITE KAOLIN CLAY: This pure and chemical-free kaolin clay powder is...
- BN-LINK Durable Seedling Heat Mat for Seed Starting 10" x 20.75", Waterproof Warming Mat Plant Heating Pad for Seed Germination, Indoor Growing, Hydroponic, Greenhouse, ETL Listed - View Product: IDEAL GERMINATION TEMPERATURE: The BN-LINK seedling heat mat helps maintain...
- HQAUT 10/8/6/5 Inch Large Clear Nursery Pots with Drainage Holes, 16 Pack Gallon Clear Plastic Pots for Plants, Seedling Starter Pot, Garden Plant Pots for Succulents Flowers - View Product: Variety Pack Nursery Pots : You will get 5/6/8/10 inch plant pots (4 of each...
- NAYE Grafting Gardening Knife,2-5/8" Curved Straight Blades Garden Knife for Budding Pruning,with Grafting Tape Plant Labels/Tree Tags - View Product: Razor sharp curved/straight two blade pocket grafting knife.
- Just Good Soil Essential Nutrient Protocol - 3-Step Soil Food System for Organic & Regenerative Gardening, Organic Plant Food & Soil Enhancer for Home Gardening - Sprout_01, Rise_02 & Replenish_03 - View Product: COMPLETE 3-STEP SOIL FOOD SYSTEM: Includes Sprout_01 Soil Life Kickstarter...
Source: Watch the original YouTube Short.
Keep growing
Suggested reading

Tomorrow Decides Who Wins the Lemon Tree 🍋
Explore the strategy behind winning a lemon tree in a competitive treasure hunt. Learn tips for caring for your own lemon plants and optimizing their growth.
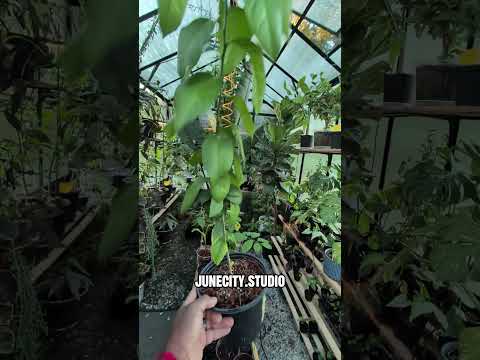
Find the Clues. Win the Lemon Tree. 🍋
Join the Junecity.studio Treasure Hunt and learn how to care for your very own Meyer lemon seedling. Discover tips, tricks, and the best practices to grow and nurture this delightful citrus tree!
0 comments
Comments (0)
We love hearing from our community. Share your thoughts, questions, or experience.
Have something to add?
Log in to post, react, share images, and join threads.
Newest First
All Comments
Showing 0-0 of 0
Start the conversation.
Questions and first-hand experience are welcome here.