
I Turned a Broken Nectarine Limb Into a New Tree!

Learn how to propagate a new nectarine tree from a broken limb using the air-layering technique, a practical guide for any gardener.

At a glance
Key Takeaways

What is Air-Layering?
A propagation technique to grow roots on a limb while still attached to the parent tree.
Materials Needed
Use Clonex Rooting Gel and a sharp knife for effective air-layering.

Common Mistakes
Avoid improper moisture and neglecting rooting compounds.
Have you ever had a fruit tree limb break off? Instead of discarding it, you can turn it into an entirely new tree! This guide will walk you through the process of air-layering a nectarine limb, allowing you to propagate a new tree from a branch that would otherwise be thrown away.
What is Air-Layering?
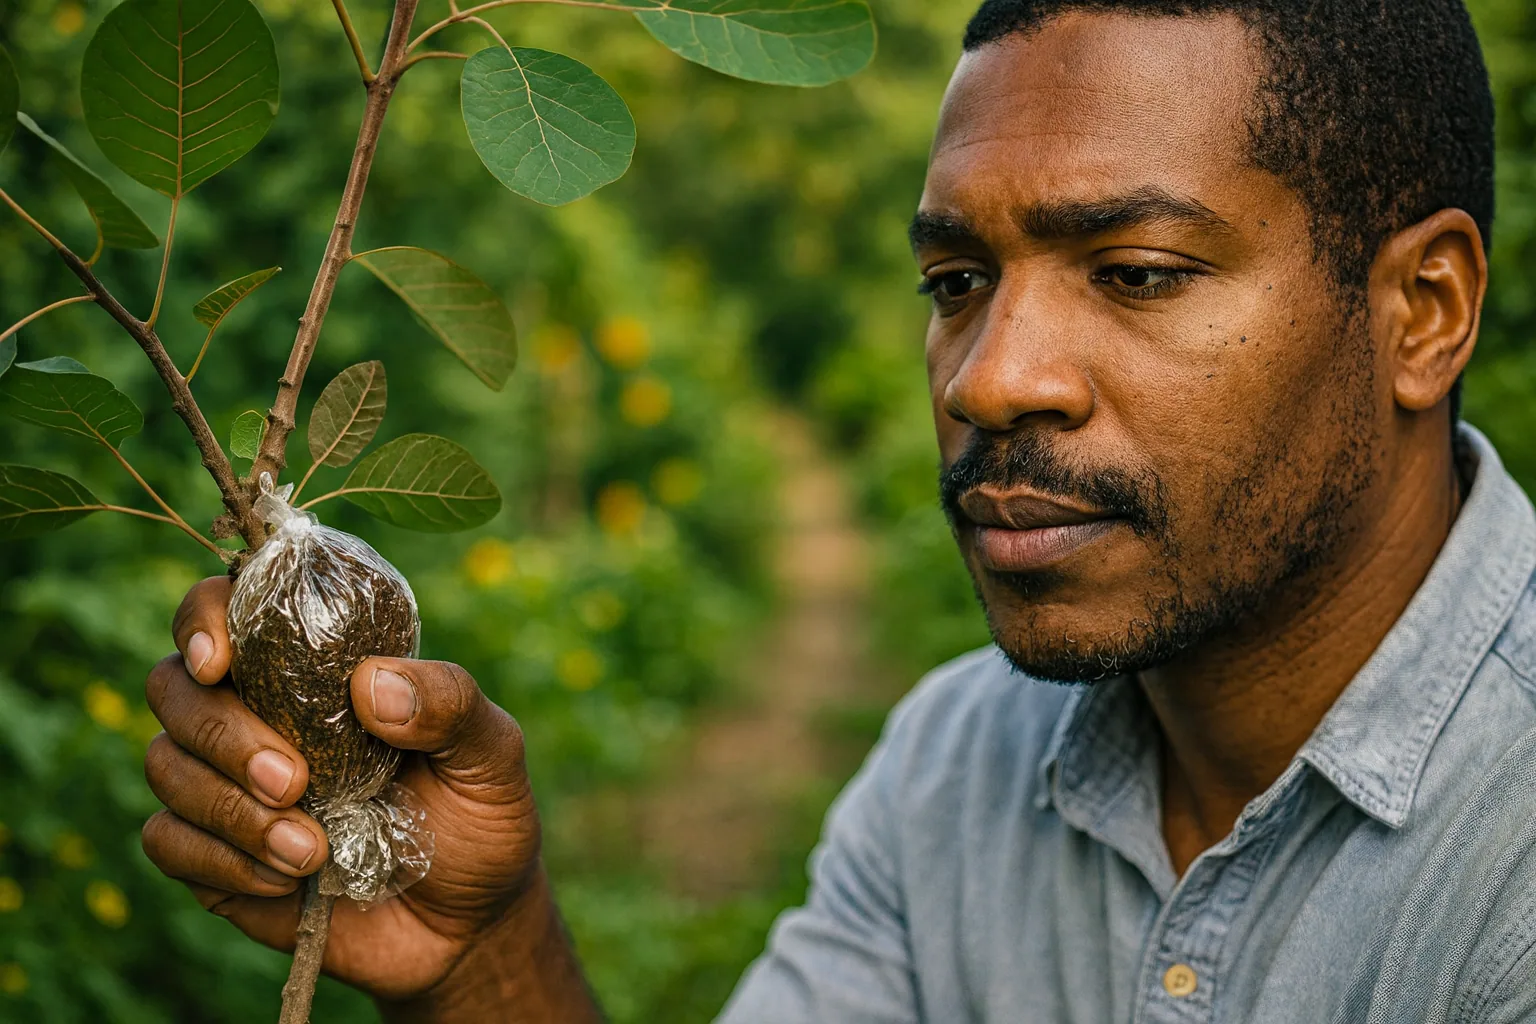
Air-layering is a propagation technique that encourages a plant to grow roots on a limb while it is still attached to the parent tree. This method is particularly useful for fruit trees like nectarines, as it allows you to create a new plant that is genetically identical to the original. Unlike other propagation methods, such as cuttings, air-layering can produce a new tree with a more established root system, leading to a higher success rate.
Air-layering is best performed in late spring to early summer when the plant is actively growing. This timing ensures that the parent tree can continue to provide nutrients to the limb while it develops roots.
Materials Needed for Air-Layering
To successfully air-layer a nectarine limb, gather the following materials:
- Clonex Rooting Gel: This high-performance rooting compound contains IBA (Indole-3-butyric acid), which promotes root initiation and development.
- Sharp Garden Knife or Grafting Knife: A clean, sharp knife is essential for making precise cuts on the limb.
- Plastic Wrap or Aluminum Foil: This will help secure the moist medium around the cut area.
- Sphagnum Moss or Potting Soil: This provides the necessary medium for root development.
- Twine or Tape: Used to secure the wrap around the limb.
- Grow Bag or Pot for Planting: Once the roots develop, you'll need a container to pot your new tree.
Step-by-Step Guide to Air-Layering a Nectarine Limb
- Select a Healthy Limb: Choose a healthy, young limb that is at least one year old and has good growth. Look for a limb that is free of disease and has several nodes, as these will help with root development.
- Make a Cut: Use a sharp grafting knife to make a circular cut around the limb, about one-third through the bark. Be careful not to cut too deep, as you want to expose the cambium layer without damaging the wood underneath.
- Apply Rooting Gel: Apply Clonex Rooting Gel to the cut area to promote root development. Ensure that the gel covers the exposed area thoroughly, as this will encourage the formation of new roots.
- Wrap with Moist Medium: Cover the cut area with damp sphagnum moss or potting soil. This medium should be moist but not overly saturated, as excessive moisture can lead to rot.
- Wrap it Up: Use plastic wrap or aluminum foil to secure the moss and keep it moist. Wrap tightly enough to hold the medium in place but not so tight that it restricts the limb's growth.
- Wait for Roots to Form: Check moisture levels regularly. Roots will typically form in 4-8 weeks, depending on environmental conditions such as temperature and humidity.
- Pot the New Tree: Once roots are visible, cut the limb below the root zone and pot it in a grow bag. Ensure that the new pot has adequate drainage and use a well-draining potting mix to support healthy root growth.
Caring for Your New Nectarine Tree
After potting your new tree, keep it in a warm, sunny location. Nectarines thrive in full sun, so place the pot in an area where it will receive at least 6-8 hours of sunlight per day. Water the tree regularly, allowing the top inch of soil to dry out between waterings. Ensure that the soil remains moist but not soggy, as overwatering can lead to root rot.
Fertilize once a month with a balanced fertilizer to encourage healthy growth. Consider using a fertilizer specially formulated for fruit trees, as this will provide the specific nutrients your new nectarine tree needs to thrive. Monitor your tree for signs of pests or diseases, and take action promptly if you notice any issues.
Common Mistakes and Troubleshooting
Even experienced gardeners can make mistakes during the air-layering process. Here are some common issues and how to troubleshoot them:
- Not Using a Rooting Compound: Failing to apply rooting gel can lead to poor root development or failure to root altogether. Always use a quality rooting compound to maximize your chances of success.
- Improper Moisture Levels: Too much or too little moisture can hinder root growth. Ensure the moss or soil remains consistently damp, and avoid letting it dry out completely.
- No Root Development: If roots do not develop after several weeks, check the moisture level of the medium and consider applying more rooting gel. If the atmosphere is too dry, consider placing a plastic bag over the wrapped area to maintain humidity.
- Yellowing Leaves on the New Plant: This could indicate overwatering or poor drainage. Ensure your pot has proper drainage holes and adjust your watering schedule accordingly.
Safety Considerations
When working with sharp tools and rooting compounds, safety should be a priority. Always wear gloves when handling rooting gels and sharp knives to avoid injury. Additionally, ensure that your workspace is organized and free of clutter to prevent accidents.
Conclusion
Air-layering is a rewarding way to propagate a new nectarine tree from a broken limb. With the right materials and care, you can turn what would have been waste into a thriving new plant. For a visual guide, check out the original video here. By following these steps, you can expand your garden and enjoy fresh nectarines from your very own tree in just a few years!
Photos from this idea

Helpful products for this project
These products were matched to the materials, tools, and care steps discussed in the article.
- Clonex Rooting Gel - High-Performance Rooting Compound for Plant Cuttings, Contains IBA, Promotes Root Initiation & Development - 100ml - View Product: HIGH-PERFORMANCE ROOTING GEL - Clonex Rooting Gel is a water-based formula with...
- MEPEREZ Premium Pruning Shears For Gardening, Work 3 Times Easier, Pruners Heady Duty, Sharp Garden Clippers Cuting Florist Flower, Hedge, Herb, Rose, Indoor Live Plants, Arthritis Weak Hand Snips - View Product: 🎁STRONG CONSTRUCTION, DURABLE, SHARP FOR A LONG TIME: Made of premium materials...
- BN-LINK 5-Pack 10 Gallon Grow Bags, Heavy Duty Aeration Fabric Pots with Handles, Thickened Nonwoven Plant Bags for Vegetables, Flowers, Fruits - View Product: 【Durable & Eco-Friendly Material】: Crafted from 300g BPA-free non-woven fabric...
- NAYE Grafting Gardening Knife,2-5/8" Curved Straight Blades Garden Knife for Budding Pruning,with Grafting Tape Plant Labels/Tree Tags - View Product: Razor sharp curved/straight two blade pocket grafting knife.
- Just Good Soil Essential Nutrient Protocol - 3-Step Soil Food System for Organic & Regenerative Gardening, Organic Plant Food & Soil Enhancer for Home Gardening - Sprout_01, Rise_02 & Replenish_03 - View Product: COMPLETE 3-STEP SOIL FOOD SYSTEM: Includes Sprout_01 Soil Life Kickstarter...
Source: Watch the original YouTube Short.
Keep growing
Suggested reading
Find the Clues. Win the Lemon Tree. 🍋
Join the Junecity.studio Treasure Hunt and learn how to care for your very own Meyer lemon seedling. Discover tips, tricks, and the best practices to grow and nurture this delightful citrus tree!

Tomorrow Decides Who Wins the Lemon Tree 🍋
Explore the strategy behind winning a lemon tree in a competitive treasure hunt. Learn tips for caring for your own lemon plants and optimizing their growth.
2 comments
Comments (2)
We love hearing from our community. Share your thoughts, questions, or experience.
Have something to add?
Log in to post, react, share images, and join threads.
Newest First
All Comments
Showing 1-1 of 1
Louis Sauris
VerifiedAug 21, 2026
This technique possible with all fruiting trees?
View 1 replyHide replies
Andre
Sep 2, 2026
Its definitely possible. Just have to try