
How to Build an Indoor Growing Shelf for Winter: A Complete Beginner's Guide

Build a simple indoor growing shelf for winter seed starting: LED lights, shelving, timers, airflow, and seedling care, step by step.
The short answer
Yes, you can grow strong seedlings indoors all winter with a setup that fits against one wall: a sturdy wire shelf, LED light bars under each shelf, a timer, trays with drainage, and a small fan.
You do not need a greenhouse, a grow tent, or a complicated electrical project. You need steady light close above the plants, a way to raise that light as plants grow, and a simple routine for water and air. This guide walks through that build for a beginner in Connecticut who is tired of leggy windowsill seedlings and wants a better start for spring.
[Image: Finished indoor growing shelf against a wall, with LED light bars under each shelf and seed trays below them — placeholder illustration, not a photograph of a completed build]
Why a shelf beats a windowsill in winter
A windowsill feels obvious: free and sunny. In a Connecticut winter, though, it is also the coldest spot in the house at night and the hottest in direct midday sun. Light comes from the side, so seedlings bend toward it. On cloudy days, there is not enough light for long enough.
University of Minnesota Extension makes the same point: a windowsill can be the coldest place in the house at night and the hottest during the day, and windowsill-grown seedlings tend to be too tall, with thin, bent stems. Light kept close above the plants gives steadier, more even growth.
A shelf fixes that. Light comes from above, so stems grow straight. Light stays close, because you hang the bars just above the trays and raise them as plants grow. Light stays consistent, because a timer runs the same schedule every day. And the mess stays on a surface you can wipe down.
Choosing your spot
Pick the spot before you buy anything. Look for a nearby outlet, a stable temperature, and a floor you do not mind getting damp. A basement, spare room, or heated garage corner usually beats a drafty window or a spot next to a radiator. University of Minnesota Extension suggests keeping air temperatures above 60°F for indoor seed starting. Leave room to pull a tray out without knocking over its neighbor, and leave headroom per level — packed levels leave no room to raise the lights.
LED lighting, explained simply
Plants do not care how bright a light looks to your eyes. They care how many usable light particles reach their leaves, and for how long each day. Growers call that measurement PPFD, short for photosynthetic photon flux density. Just remember: distance matters more than brightness at the store.
Move a light twice as far away, and the light reaching the leaves drops sharply. That is why a ceiling light across the room does almost nothing for seedlings, while a modest bar kept close above a tray can do a great job. Check your fixture manufacturer's guidance, because low-output bars and high-output panels need different hanging heights.
How close should the lights be?
For low-output fluorescent and LED bar setups commonly used for seed starting, University of Minnesota Extension recommends keeping lights no more than 4 inches above the tops of seedlings, with as close as 2 inches described as ideal for its setup. Kansas State University Extension gives a similar range: no further than 4 to 6 inches from the top of growing plants, raised as the plants grow.
Treat that as a habit: start close, check every few days, and raise the light so the gap stays about the same. If seedlings stretch tall and pale, check light first — University of Minnesota Extension notes that lack of light is the major cause of elongated, skinny stems. For higher-output fixtures, follow that manufacturer's guidance instead. No specific PPFD target is given here, because the right intensity varies by fixture and crop.
How long should the lights be on?
University of Minnesota Extension recommends 12 to 16 hours of light daily, and warns against leaving lights on continuously, because many plants need a dark period each night. A practical target is 14 to 16 hours on, with the rest of the day dark. A timer removes the daily remembering.
The featured light: Barrina T5 Grow Lights
For a beginner shelf, a linkable LED bar is a sensible choice because it matches the shape of a tray: long, even, and easy to mount under a shelf.
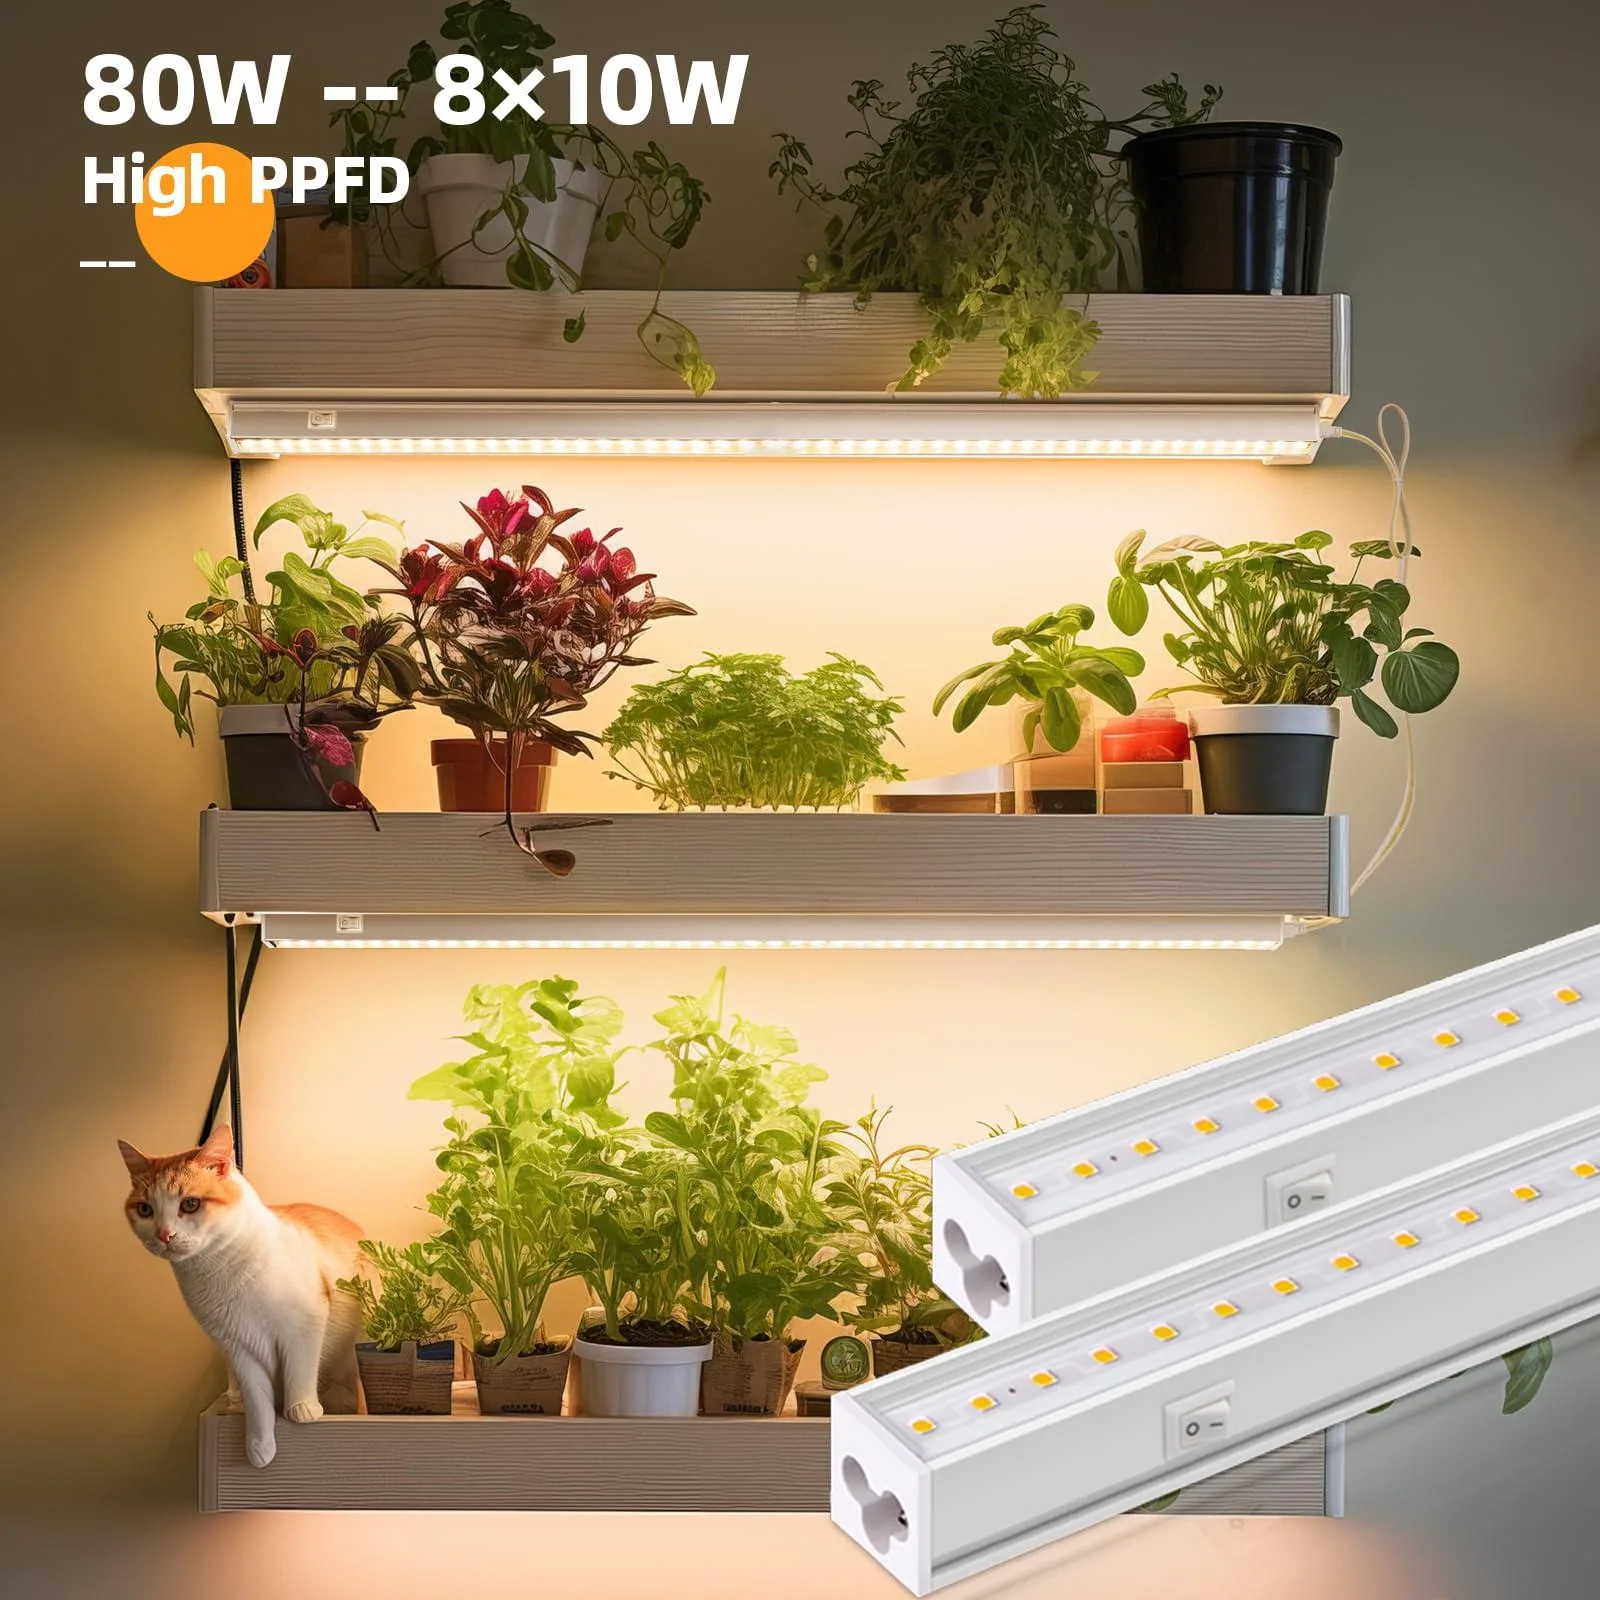
The featured product for this guide is the Barrina T5 Grow Lights. Barrina's T5 line is designed as full-spectrum LED strips that can be linked together, so you can cover a shelf level evenly instead of lighting only the middle of a tray and leaving the edges in shadow.
Mount one or two bars under each shelf, spaced for full coverage. Keep them adjustable from day one, on chains, S-hooks, or hangers — fixed mounts frustrate you within a week as seedlings grow. Follow your exact Barrina model's instructions for linking limits and mounting.
No price, rating, or performance claim is made for this product here, because none was verified for this specific listing during drafting. What matters is the form factor: a long, linkable bar that fits under a shelf and can be raised as plants grow.
[Image: Diagram of two LED bars mounted under a wire shelf with adjustable chains and a seed tray below — placeholder diagram]
Comparing your options
SetupBest forWatch out forSunny windowsillA few houseplants, or a very small trialCold nights, hot midday sun, leaning and stretchingSingle light over a tableOne or two trays, first-time seed startingTray edges get less light; space runs out fastWire shelf with a light bar per levelWinter seed starting, herbs, and leafy greensNeeds an outlet plan and a timer; wet trays add weightGrow tent with a high-output panelLarger indoor growing, fruiting plantsMore cost and heat; overkill for seedlings aloneFor most beginners, the third row is the sweet spot. Start with one lit level, add a second when you need it, and leave the top shelf for supplies.
Step by step: building the shelf
1. Measure and choose the shelving
Measure your wall space, then choose a wire unit that fits with room to work around it. Check that shelves are level and stable when loaded, height is adjustable, the unit does not wobble when you pull a tray out, and you have a waterproof tray or mat under each growing level. Assemble it exactly as the manufacturer directs.
2. Decide how many lit levels you need
Start with one or two lit levels, not four — each needs lights, a timer circuit, and daily attention. A useful layout: bottom for supplies, middle and upper for trays with lights above them, top kept clear for labels.
3. Mount the lights so you can move them
Mount bars under the shelf above the trays, spaced so the tray is lit edge to edge — one bar down the middle leaves outer rows reaching inward. Hang bars on adjustable chains or hangers with S-hooks. Route cords neatly along the frame, away from water, and test the timer before sowing.
4. Set the timer
Use a schedule inside the 12-to-16-hour extension range: on early morning, off in the evening, giving 14 to 16 hours of light. Keep it steady. Do not plug a heat mat into the light timer — mats and lights run on different schedules.
5. Set up trays, mix, and drainage
Use trays and cells with drainage holes — without drainage, water sits at the roots. Use fresh, sterile seed-starting mix, not garden soil. Fill cells with pre-moistened mix that feels like a wrung-out sponge. Sow at the packet depth; University of Minnesota Extension gives a rule of thumb of about twice the seed's width, and tiny seeds that need light should barely be covered. Label every tray immediately with variety and date. Set trays inside a solid outer tray, and empty it after watering.
6. Add airflow and manage humidity
A gentle breeze dries leaf surfaces, strengthens stems, and makes it harder for damping-off fungi to take hold. Set a small fan so air moves near the trays, not blasting at them. Run it part of the day, especially after watering. A clear humidity dome helps germination, but remove it once seedlings are up and touching it, or sooner if condensation stays heavy. After sprouting: dome off, fan on, watering eased back.
7. Watch temperature and humidity at plant level
A monitor tells you what your eyes cannot: is a level near a cold wall running cooler than the room? The TempPro TP50 temperature/humidity monitor displays readings locally. It does not send remote alerts, so treat it as a shelf-side gauge you check daily. Place it at plant level. For warmth-loving seeds such as tomatoes and peppers, a heat mat under the tray can help by warming the mix from below. Read the related Junecity Studio guide on seedling heat mats for when a mat helps and when it does not (draft cross-link, do not link /blog/do-seedling-heat-mats-really-work live yet). One clear limit: a heat mat heats trays, not a greenhouse or a room. The catalog product is the VIVOSUN seedling heat mat with thermostat, switched off or removed once most seeds have germinated, per its instructions.
[Image: Seed tray setup on a wire shelf — cells filled with seed-starting mix, labels in place, solid outer tray underneath — placeholder illustration]
Daily seedling care
Watering. Keep mix moist while seeds germinate, then moist but not soggy once seedlings are up. Check first: water only if the top feels dry. Water from below when you can, then drain fully.
Feeding. Seedlings do not need fertilizer to germinate. University of Minnesota Extension advises waiting until several sets of true leaves appear, then feeding a weak, general-purpose, water-soluble fertilizer at one-quarter strength, once a week, with plain water otherwise.
Thinning and potting up. Keep the strongest seedling per cell and snip the others at soil level. When seedlings outgrow their cells, move them to slightly wider containers, lifting by the root ball or a leaf — never by squeezing the stem.
Hardening off. Seedlings raised indoors are not ready for full sun and wind on day one. University of Minnesota Extension suggests starting about two weeks before planting out: a few hours in afternoon shade, back inside before night, then a little longer and more sun each day.
Troubleshooting
SymptomLikely causeFirst fixTall, pale, floppy stemsLight too far away or on too few hoursLower lights to the close range in this guide; check the timerSeedlings lean to one sideLight from one direction, or tray edge in shadowCenter trays under bars; add a second bar if edges are darkSeedlings collapse at the soil lineDamping-off from a wet surface and still airRemove affected seedlings and any dome, add airflow, water from below, restart with clean trays and fresh mix if it spreadsLeaves yellow, growth stallsOverwatering, standing water, or feeding too earlyDrain trays fully, let mix dry a little between waterings, hold fertilizer until true leaves appearNothing sproutsMix too cold, seed too deep, old seed, or mix dried outCheck mix warmth, re-read packet depth, sow fresh seed, keep mix evenly moistWhite mold on mix surfaceSurface staying wet, dome on too long, poor airflowRemove dome, improve airflow, water from below, let surface dry between wateringsDamping-off is hard to reverse once seedlings collapse, so prevention is the strategy: clean trays, fresh mix, a drier surface, airflow, and no dome after sprouting.
Frequently asked questions
Can I build this shelf in a basement?
Yes — temperatures are steadier there than on a drafty windowsill. You need an outlet, a floor that can handle drips, and enough headroom per level.
Do I need a grow tent as well?
Not for basic seed starting. Open wire shelving with good room airflow is simpler, cheaper, and easier to check daily. Add a tent later only if a specific problem calls for it.
How many light bars do I need per shelf?
Enough to light the full tray width evenly — usually two bars spaced across the width, not one down the middle. Check coverage before sowing: dark edges mean edge seedlings will stretch inward.
Can I grow herbs and leafy greens on the shelf all winter?
Yes. Basil, parsley, and lettuce suit a shelf because they are harvested young and do not need the space or intensity of a fruiting tomato plant. Sow small batches in succession so young plants are always coming on.
Is an indoor shelf a replacement for my greenhouse?
No — the shelf is the winter nursery; the greenhouse is the next stage. For a different small project, see the Junecity Studio mini-ecosystem drum project (draft project, not published — do not link live yet).
Recommended tools and shopping list
Start with:
- Wire shelving unit — Sturdy, adjustable shelves, sized for your wall and trays.
- Barrina T5 Grow Lights — Featured product. Linkable LED bars for under each shelf level, spaced for even coverage.
- Outlet timer — One per lit level if levels run different schedules, otherwise one for the shelf.
- Seed trays with drainage, plus solid outer trays and humidity domes — Cells with holes, set inside a solid tray.
Add for control and daily care:
- Adjustable light hangers, chains, and S-hooks — Raise lights as seedlings grow, without remounting.
- Small circulation fan or clip-on fan — Gentle airflow near trays, not a direct blast.
- TempPro TP50 temperature/humidity monitor — Already in the Junecity Studio catalog. Displays readings locally; sends no remote alerts.
- VIVOSUN seedling heat mat with thermostat — Already in the Junecity Studio catalog. Tray-heating complement for warmth-loving seeds only; it heats trays, not a greenhouse or room.
You probably already have: fresh seed-starting mix, seed packets, labels and a marker, a spray bottle, scissors for thinning, and a jug for bottom watering. Build one lit level first, run it two weeks, and let that tell you what the second level needs.
A simple first-week routine
Morning: check trays. After sprouting: dome off, fan on, lights raised if needed. Watering days: water from below, drain fully. Every few days: raise lights and rotate trays. Weekly, once true leaves appear: feed at one-quarter strength and thin to the strongest seedling. Before transplanting: harden off over about two weeks.
Affiliate disclosure
Some links in this article are affiliate links, including the Barrina T5 Grow Lights, TempPro TP50, and VIVOSUN heat mat links. If you buy through one, Junecity Studio may earn a commission at no additional cost to you, helping support the site and its guides. Recommendations are based on fit for a beginner shelf setup, not on a promise about price, ratings, or results, and no product testing claim is made here.
Keep growing with Junecity Studio
A winter shelf is a small build with a long payoff: the darkest months become preparation. Start with one level, keep the lights close, keep the air moving, and let the routine do the work.
Explore more guides, projects, and tools at junecity.studio, and visit the Junecity Studio shop for tools and supplies featured across the site.
Further reading and sources
These sources were checked during drafting. No other study, statistic, or product specification is claimed.
- University of Minnesota Extension, "Starting seeds indoors": https://extension.umn.edu/planting-and-growing-guides/starting-seeds-indoors
- Kansas State University Extension, Johnson County, "Growing Your Own Seeds: How to set up your lights": https://www.johnson.k-state.edu/programs/lawn-garden/agent-articles-fact-sheets-and-more/agent-articles/miscellaneous/growing-your-own-seeds-how-to-set-up-your-lights.html
- Barrina official T5 line pages — linkable, full-spectrum bar design for the T5 line in general, not a specification sheet for the featured ASIN specifically: https://www.barrina-led.com/products/barrina-t5-10w-led-grow-lights-2ft-pinkish-white-full-spectrum-linkable-mf10
- Hydrobuilder Learning Center, "Damping Off Disease — Prevention & Treatment": https://learn.hydrobuilder.com/damping-off-disease/
Keep exploring
Find more Junecity guides
Browse practical gardening, outdoor living, and DIY articles.Browse the blogShop this guide
Affiliate Picks
Tools & supplies I use and recommend


As an affiliate, junecity.studio may earn from qualifying purchases at no additional cost to you.
Keep growing
Suggested reading

Picking Fresh Pears Straight From My Tree! 🍐
Experience the joy of harvesting fresh pears directly from your own tree in Connecticut. This guide shares tips on how to successfully pick and enjoy your homegrown pears.

Growing 11-Foot Banana Trees in Connecticut: A Comprehensive Guide
Discover how to successfully grow cold-hardy banana trees in Connecticut, including root protection methods and essential care tips for these tropical plants.
0 comments
Comments (0)
We love hearing from our community. Share your thoughts, questions, or experience.
Have something to add?
Log in to post, react, share images, and join threads.
Newest First
All Comments
Showing 0-0 of 0
Start the conversation.
Questions and first-hand experience are welcome here.