
The Perfect V-Graft Fit
Master the art of V-grafting with this detailed guide. Learn how to achieve the perfect fit, secure your graft, and ensure successful healing for your plants.

At a glance
Key Takeaways
Preparation is Key
Ensure all tools are sharp and clean before starting the grafting process.
Choose Compatible Plants
The success of your graft depends on the compatibility of the scion and rootstock.

Secure Properly
Use zip ties or grafting tape to hold the graft securely for optimal healing.

Monitor Progress
Keep an eye on the graft site to ensure it remains healthy and secure throughout the healing process.
Grafting is a fascinating technique that allows gardeners to combine the strengths of two different plants into one. Among the various grafting methods, V-grafting stands out for its ability to create a strong union, especially in fruit trees. This article will walk you through the process of achieving the perfect V-graft fit, ensuring your grafts take successfully.
Understanding V-Grafting
V-grafting is a method typically used to join a scion (the young shoot or twig) to a rootstock. This technique involves making a V-shaped cut on both the scion and the rootstock, allowing for maximum cambial contact, which is crucial for the graft to heal and thrive. The best time to perform V-grafting is during the late winter to early spring when the plants are still dormant but the sap is beginning to flow. This timing increases the likelihood of successful grafting as the plants are more receptive to the process.
Why V-Grafting Matters
- Strength: The V-shape allows for a larger surface area for the cambium layers to connect, leading to a stronger bond that can support the growth of both the scion and rootstock.
- Compatibility: V-grafting can be done with various compatible species, making it a versatile option for gardeners looking to enhance their fruit trees.
- Healthier Plants: Proper grafting techniques can result in healthier, more vigorous plants, as the grafted tree can benefit from the rootstock's resilience and adaptability.
Materials Needed
Before you begin the grafting process, gather all necessary materials. Having everything ready will streamline your workflow and minimize stress during the actual grafting:
- Sharp grafting knife: A clean and sharp knife is essential for making precise cuts without crushing the plant tissues.
- Metal zip ties or grafting tape: These are used to secure the graft in place, ensuring that the scion and rootstock remain tightly bound together.
- Pruning shears: Useful for trimming excess growth and preparing your plants for grafting.
- Sealant (optional): While not strictly necessary, a grafting sealant can help protect the graft site from moisture loss and pests.
Steps to Achieve the Perfect V-Graft Fit
Follow these detailed steps to ensure a successful V-graft:
- Prepare Your Tools: Ensure all your tools are clean and sharp to avoid damaging the plants. Sanitize your knife and shears to prevent any disease transmission.
- Select Your Scion and Rootstock: Choose healthy specimens that are of similar diameter. The compatibility of the scion and rootstock is crucial; they should ideally belong to the same family for best results.
- Make the V-Cuts: Create a V-shaped cut on both the scion and the rootstock, ensuring they are the same size and shape for a snug fit. The angle of the cut should be approximately 45 degrees, and the depth should be about one-third of the diameter of the stem.
- Align the Cuts: Press the scion into the rootstock, aligning the cambium layers of both plants. Make sure the inner sides of the cuts are in contact; this is where the healing will occur.
- Secure the Graft: Use metal zip ties or grafting tape to hold the scion and rootstock together tightly. Ensure that there is enough tension to keep them firmly together without damaging the plant tissues.
- Seal the Graft (Optional): Apply a grafting sealant to protect the graft from moisture loss and potential pests. This helps to create a barrier against environmental factors that could hinder the healing process.
- Monitor the Graft: Keep an eye on the graft site, ensuring it remains secure and does not dry out. Check for any signs of distress or infection and be prepared to intervene if necessary.
Common Mistakes to Avoid
Avoid these common pitfalls to increase your chances of success:
- Using dull tools: Dull tools can crush the plant tissues, leading to poor healing and increased risk of infection.
- Not securing the graft tightly enough: Insufficient tension can lead to movement that disrupts the healing process, causing the graft to fail.
- Ignoring the timing of grafting: Performing it too late in the season can hinder success, as the plants may not have enough time to heal before dormancy.
- Neglecting aftercare: Failing to monitor and care for the graft site can lead to complications. Regularly check for moisture levels and signs of growth.
Key Takeaways
- Preparation is Key: Ensure all tools are sharp and clean before starting the grafting process.
- Choose Compatible Plants: The success of your graft depends on the compatibility of the scion and rootstock.
- Secure Properly: Use zip ties or grafting tape to hold the graft securely for optimal healing.
- Monitor Progress: Keep an eye on the graft site to ensure it remains healthy and secure throughout the healing process.
Frequently Asked Questions
What types of plants can be grafted using the V-graft technique?
Many fruit trees and ornamental plants can be successfully grafted using the V-graft method, provided they are compatible species. Common examples include apples, pears, and cherries.
How long does it take for a graft to heal?
Typically, a graft can take anywhere from a few weeks to several months to fully heal, depending on the plant species and environmental conditions. Regular monitoring is essential during this period.
Can I graft trees in the summer?
While it's possible to graft in the summer, it's generally not recommended for V-grafting. The best results are achieved during the spring when plants are actively growing. Summer grafting can lead to increased stress on the plants.
What should I do if the graft fails?
If a graft fails, don’t be discouraged. Assess what went wrong—whether it was the timing, the tools, or the plant compatibility—and try again. Grafting is a skill that improves with practice.
Conclusion
V-grafting is a rewarding technique that opens up a world of possibilities in fruit tree cultivation. With the right tools, techniques, and care, you can create strong, healthy plants that produce fruit for years to come. By following the steps outlined in this guide, you can master the art of V-grafting and enhance your gardening skills.
Photos from this idea
Helpful products for this project
These products were matched to the materials, tools, and care steps discussed in the article.
- MEPEREZ Premium Pruning Shears For Gardening, Work 3 Times Easier, Pruners Heady Duty, Sharp Garden Clippers Cuting Florist Flower, Hedge, Herb, Rose, Indoor Live Plants, Arthritis Weak Hand Snips - View Product: 🎁STRONG CONSTRUCTION, DURABLE, SHARP FOR A LONG TIME: Made of premium materials...
- Metal Zip Ties,100 Pcs 11.8 Inch,304 Stainless Steel Zip Ties Multi-purpose Metal Cable Ties-Suitable for Outdoor Chain Link Fence and Exhaust Wrap Zip Ties - View Product: HIGH QUALITY: Our metal zip ties are made of high-quality 304 stainless steel...
- NAYE Grafting Gardening Knife,2-5/8" Curved Straight Blades Garden Knife for Budding Pruning,with Grafting Tape Plant Labels/Tree Tags - View Product: Razor sharp curved/straight two blade pocket grafting knife.
- Armpow 12 Inch Zip Ties Black 1000 PCS, 60 Lbs- Heavy Duty Tensile Strength, Nylon PA66 UV Resistant Cable Ties for Indoor and Outdoor Use - Ideal for object bundling and fastening - View Product: 【Zip Tie Details】 Specifications Length: 12in | Width: 0.18in | Maximum Diameter...
- Bird Netting for Garden, 26 x 49FT Heavy Duty Anti Bird Netting Mesh with Ties and Landscape Staples for Vegetable, Fruit Trees & Other Plants, Lasting Against Birds Squirrels and Poultry, Black - View Product: HDPE Material: Different from traditional nylon and polypropylene (PP) materials...
Source: Watch the original YouTube Short.
Frequently Asked Questions
Many fruit trees and ornamental plants can be successfully grafted using the V-graft method, provided they are compatible species. Common examples include apples, pears, and cherries.
Typically, a graft can take anywhere from a few weeks to several months to fully heal, depending on the plant species and environmental conditions. Regular monitoring is essential during this period.
While it's possible to graft in the summer, it's generally not recommended for V-grafting. The best results are achieved during the spring when plants are actively growing. Summer grafting can lead to increased stress on the plants.
If a graft fails, don’t be discouraged. Assess what went wrong—whether it was the timing, the tools, or the plant compatibility—and try again. Grafting is a skill that improves with practice.
Keep exploring
Ready to Start Grafting?
Check out our selection of grafting tools to get started on your gardening journey!Shop NowKeep growing
Suggested reading
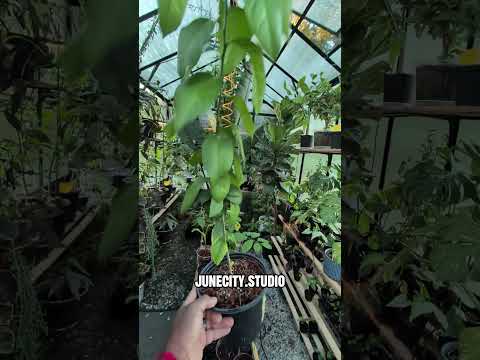
Find the Clues. Win the Lemon Tree. 🍋
Join the Junecity.studio Treasure Hunt and learn how to care for your very own Meyer lemon seedling. Discover tips, tricks, and the best practices to grow and nurture this delightful citrus tree!

I Grew This Apple Tree From Seed… Then Grafted Yellow Delicious Onto It 🍎
Discover the journey of growing an apple tree from seed and the process of grafting a Yellow Delicious onto it. Learn essential techniques, tips, and common mistakes to avoid for successful grafting.
0 comments
Comments (0)
We love hearing from our community. Share your thoughts, questions, or experience.
Have something to add?
Log in to post, react, share images, and join threads.
Newest First
All Comments
Showing 0-0 of 0
Start the conversation.
Questions and first-hand experience are welcome here.