
I’m Creating a Backup of My Honeycrisp Apple Tree! 🍎
Learn how to successfully create a backup of your Honeycrisp apple tree through grafting, ensuring that your favorite variety is preserved.
At a glance
Key Takeaways

Grafting Technique
Grafting is an effective way to propagate specific fruit tree varieties.
Cutting Selection
Choose healthy cuttings and ensure proper alignment during grafting.
Aftercare Importance
Aftercare is crucial for the success of your graft.

Common Mistakes
Monitoring for common mistakes can help improve your grafting success rate.
Creating a backup of your Honeycrisp apple tree is a smart gardening strategy, especially if you only have one of these beloved trees. Grafting is the technique that allows you to propagate a new tree from cuttings of your original tree. This guide will walk you through the entire process, from understanding grafting to troubleshooting common issues.
Understanding Grafting
Grafting is a horticultural technique where tissues from one plant are inserted into those of another so that the two sets may join together. This method is commonly used to propagate specific varieties of fruit trees, ensuring that the new tree produces the same fruit as the parent. In this case, we will be grafting cuttings from your Honeycrisp apple tree onto a Yellow Delicious tree to create a backup. This technique not only preserves the genetic makeup of your favorite fruit variety but also allows you to maximize the use of space in your garden.
Why Create a Backup?
Creating a backup tree is essential if you want to preserve a specific apple variety. If the original Honeycrisp tree is damaged or dies, the grafted tree can serve as a replacement, maintaining the desired fruit characteristics. Additionally, grafting allows you to explore the possibility of growing multiple varieties on a single tree, effectively creating a mini orchard. This practice is particularly beneficial for gardeners with limited space.
Tools Needed for Grafting
Before you begin the grafting process, gather the necessary tools to ensure a successful outcome. Here's a detailed list of what you'll need:
- Grafting Knife: A sharp grafting knife is crucial for making clean cuts. Look for a knife that has a curved blade for better maneuverability.
- Rooting Gel: This specialized gel helps promote root initiation at the graft site, providing the necessary hormones for the cutting to take root.
- Pruning Shears: Useful for trimming both the donor and recipient trees. Make sure they are sharp to avoid crushing the stems.
- Grafting Tape: This tape is essential to secure the graft and protect it from moisture loss. Choose a biodegradable option if possible.
- Seedling Bags: To help nurture the grafted cuttings, especially if you are starting them indoors before transplanting them outdoors.
- Alcohol or Disinfectant: To sterilize your tools before use, reducing the risk of disease transmission.
Choosing the Right Cuttings
Selecting healthy cuttings from your Honeycrisp tree is vital for a successful graft. Look for one-year-old wood that is firm and free from disease. Ideally, cuttings should be about 6-8 inches long with at least two or three buds. The best time to take cuttings is during the late winter or early spring when the tree is still dormant but starting to show signs of life. This timing ensures that the sap flow is minimal, reducing the stress on the tree.
The Grafting Process
Once you have your tools and cuttings ready, follow these steps to graft your Honeycrisp apple tree:
- Prepare the Cutting: Make a clean cut at the base of your chosen cutting using the grafting knife. Aim for a diagonal cut to increase the surface area for the graft.
- Prepare the Rootstock: Make a matching cut on the Yellow Delicious tree where you want to attach the cutting. This cut should also be diagonal and should match the angle of the cutting.
- Join the Cutting and Rootstock: Align the cambium layers (the green layer just under the bark) of both plants as closely as possible. This alignment is crucial for the success of the graft.
- Secure the Graft: Use grafting tape to wrap the joint tightly, ensuring no moisture escapes. The tape should hold the graft secure while allowing some flexibility for growth.
- Apply Rooting Gel: Coat the graft area with rooting gel to promote root development. This gel should be applied generously but not excessively.
Aftercare for Grafted Trees
Once your graft is secure, it's essential to care for it properly. Keep the grafting area moist but not soggy and protect it from direct sunlight. Monitor the graft for signs of success, such as new growth emerging from the cutting. Here are some additional aftercare tips:
- Check the graft site regularly for any signs of wilting or drying. If you notice any issues, mist the area lightly with water.
- Remove any suckers that may grow from the rootstock below the graft, as these can divert energy away from your new cutting.
- Once you see new growth, typically within a few weeks, you can begin to gradually reduce the moisture at the graft site.
- Consider using a shade cloth if the sun is particularly intense in your area, as this can help prevent scorching.
Troubleshooting Common Issues
Common Mistakes
- Using Dull Tools: Dull tools can create jagged cuts that may not heal properly. Always ensure your tools are sharp and clean before starting.
- Improper Sealing: If the graft is not secured properly, it may not take. Make sure to wrap the graft tightly enough to hold it in place.
Symptoms and Solutions
- Graft Fails to Take: If the graft site fails to take and the cutting wilts, ensure the graft site is kept moist and reapply grafting tape if necessary.
- Signs of Rot: If the cutting shows signs of rot, check for proper drainage and air circulation around the graft area and adjust your care routine accordingly.
- Slow Growth: If the graft is taking but growth is slow, ensure it is receiving adequate sunlight and nutrients. Consider applying a balanced fertilizer once new growth appears.
Conclusion and Next Steps
Creating a backup of your Honeycrisp apple tree through grafting is a rewarding project that ensures the continuity of your favorite fruit variety. With the right tools and techniques, you can successfully propagate your tree and enjoy its fruits for years to come. Remember that grafting requires patience and practice; don’t be discouraged by initial setbacks. Each grafting experience will teach you something new.
For those who are interested in exploring further, consider experimenting with different apple varieties on the same tree. This not only diversifies your harvest but also makes for an engaging gardening project. Happy grafting!
Key Takeaways:
- Grafting is an effective way to propagate specific fruit tree varieties.
- Choose healthy cuttings and ensure proper alignment during grafting.
- Aftercare is crucial for the success of your graft.
- Monitoring for common mistakes can help improve your grafting success rate.
Photos from this idea

Helpful products for this project
These products were matched to the materials, tools, and care steps discussed in the article.
- Clonex Rooting Gel - High-Performance Rooting Compound for Plant Cuttings, Contains IBA, Promotes Root Initiation & Development - 100ml - View Product: HIGH-PERFORMANCE ROOTING GEL - Clonex Rooting Gel is a water-based formula with...
- MEPEREZ Premium Germany - Steel Pruning Shears, Work 3 Times Easier, Pruners Heady Duty, Sharp Garden Clippers Cuting Florist Flower, Hedge, Herb, Rose, Indoor Live Plants, Arthritis Weak Hand Snips - View Product: 🎁WELL-MADE AND EASY TO USE: Our German-style garden clippers are a high quality...
- GREANER 200 PCS Nursery Bags, 5.5"x6.3" Non-Woven Fabric Seedling Bags Biodegradable for Home Garden Supply, Tree, Flower, Vegetable, Nursery Pots Container Plants Pouch - View Product: 【VALUE PACK】200 pcs seedling nursery bags, enough for your plant needs.They are...
- NAYE Grafting Gardening Knife,2-5/8" Curved Straight Blades Garden Knife for Budding Pruning,with Grafting Tape Plant Labels/Tree Tags - View Product: Razor sharp curved/straight two blade pocket grafting knife.
- BN-LINK Durable Seedling Heat Mat for Seed Starting 10" x 20.75", Waterproof Warming Mat Plant Heating Pad for Seed Germination, Indoor Growing, Hydroponic, Greenhouse, ETL Listed - View Product: IDEAL GERMINATION TEMPERATURE: The BN-LINK seedling heat mat helps maintain...
Source: Watch the original YouTube Short.
Keep exploring
Ready to Start Grafting?
Explore our recommended tools for grafting and ensure your project is a success!Shop Now
Keep growing
Suggested reading
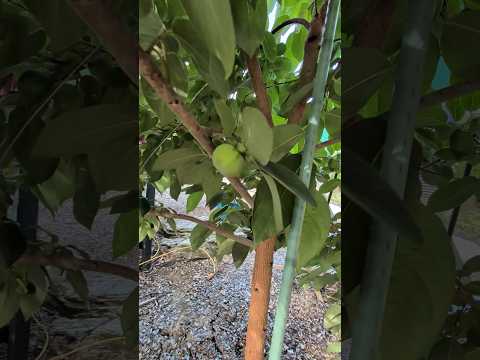
My Persimmon Tree FINALLY Produced! 👀
After three years of care, my persimmon tree has finally produced fruit! Join me as I share the journey, tips for growing persimmons, and what to expect as these fruits ripen in Connecticut.

A Jamaican Favorite Is Blooming in Connecticut! 🇯🇲
Discover how to grow the delicious naseberry tree in Connecticut, embracing a piece of Jamaican culture right in your backyard. Learn about the unique conditions, care tips, and the joy of witnessing this tropical fruit bloom in northern climates.
3 comments
Comments (3)
We love hearing from our community. Share your thoughts, questions, or experience.
Have something to add?
Log in to post, react, share images, and join threads.
Newest First
All Comments
Showing 1-2 of 2
Jermaine Folly
VerifiedAug 22, 2026
I always wanted to try this but I nevered tried due to having zero success at cloning
James robinson
VerifiedAug 19, 2026
Im going to get me a couple apple tree one day. + a pear tree
View 1 replyHide replies
Andre
Aug 19, 2026
You definitely should! 🍎🍐 There’s nothing like picking apples and pears right from your own yard. Just make sure you choose varieties that grow well in your area, and before you know it you’ll have your own little backyard orchard!