
The Easiest Greenhouse Shelves I’ve Ever Built
Learn how to create and install simple yet effective greenhouse shelves using 1"x2" wood strips and shelf brackets. Perfect for maximizing your greenhouse space!
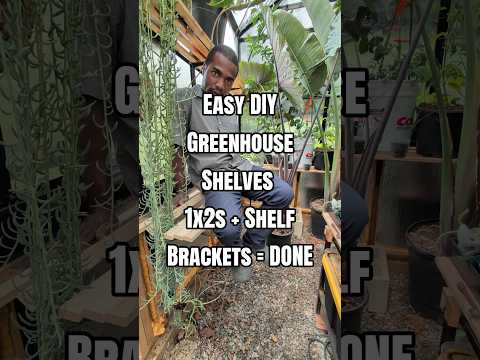
Building Your Own Greenhouse Shelves
Creating shelves in your greenhouse can be a game-changer for organization and efficiency. With just a few simple materials, you can build sturdy shelves that will hold your plants and gardening supplies with ease. This guide will walk you through the process, ensuring you have a functional and attractive shelving system to maximize your greenhouse space.
Why You Should Add Shelves to Your Greenhouse
Having shelves in your greenhouse allows for better utilization of vertical space, which is especially valuable in smaller greenhouses. Here are some benefits:
- Improved Organization: Shelves enable you to categorize and store your plants and gardening tools neatly. This reduces clutter and makes it easier to find what you need.
- Enhanced Airflow: Elevating plants off the ground can improve air circulation, reducing the risk of mold and mildew, which can thrive in damp, enclosed spaces.
- Accessibility: Easy access to your plants and supplies makes gardening more enjoyable and efficient. You won’t have to bend down or rummage through piles of items to find what you need.
- Maximized Light Exposure: Shelves allow you to position plants at different heights, optimizing their exposure to sunlight, which is critical for growth.
- Customizable Space: You can design your shelves to fit your specific needs, whether that’s for starting seedlings, storing pots, or displaying decorative plants.
Materials Needed
Before you start building your greenhouse shelves, gather the following materials:
- 1"x2" wood strips (the number will depend on how many shelves you want to create)
- Heavy-duty shelf brackets (ensure they can support the weight of your items)
- Self-tapping screws (suitable for wood and metal, depending on your greenhouse structure)
- Drill (for drilling holes and securing screws)
- Measuring tape (to ensure accurate measurements)
- Level (to keep your shelves even)
- Sandpaper (optional, for smoothing out rough edges)
- Wood glue (optional, for additional stability)
- Paint or wood stain (optional, for aesthetics and protection)
Step-by-Step Instructions
- Measure Your Space: Determine where you want to install the shelves and measure the available space. Consider the height of your plants and any equipment that may also need to fit on the shelves.
- Cut the Wood: Cut your 1"x2" wood strips to the desired length for each shelf. A common length is around 4 to 6 feet, but this will vary based on your greenhouse dimensions. Use a saw for clean cuts, and wear safety goggles for protection.
- Attach Brackets: Using your drill and self-tapping screws, attach the shelf brackets to the greenhouse frame at the desired height. Ensure that the brackets are level so that the shelves will sit evenly. Depending on your greenhouse, you may need to pre-drill holes to make installation easier.
- Install Shelves: Place the cut wood strips into the brackets. Make sure they fit snugly and are level before securing them in place with screws. If you are using wood glue, apply it before inserting the screws for added stability.
- Final Touches: Sand any rough edges to prevent splinters and ensure a smooth finish. If desired, paint or stain the wood to match your greenhouse decor and provide additional protection against moisture.
Common Mistakes to Avoid
When building your greenhouse shelves, be mindful of these common pitfalls:
- Inaccurate Measurements: Double-check your measurements before cutting wood to ensure a proper fit. It’s easy to make mistakes that can lead to wasted materials.
- Overloading Shelves: Ensure that your shelves can support the weight of the plants and materials you intend to place on them. It’s better to err on the side of caution and distribute weight evenly.
- Neglecting Airflow: Position shelves to allow for adequate airflow around your plants. This can help prevent overheating and promote healthy growth.
- Ignoring Stability: Make sure that the brackets are securely attached to the frame and that the shelves themselves are stable. Wobbly shelves can be dangerous and lead to accidents.
- Using Poor Quality Materials: Invest in good quality wood and brackets that can withstand the conditions of a greenhouse, such as humidity and temperature fluctuations.
Maintenance Tips
To keep your shelves in good condition, consider the following maintenance tips:
- Regularly check for any signs of wear or damage and repair as necessary. Look for loose screws, cracks in the wood, or rust on metal brackets.
- Clean the shelves periodically to remove dirt and debris that can accumulate. A simple solution of soap and water can work wonders.
- Adjust the height of shelves as your plants grow to ensure they have enough space. This might involve moving brackets higher or adding additional shelves.
- Reapply paint or wood stain every few years to protect the wood from moisture and extend the life of your shelves.
- Consider adding a protective sealant to the wood to prevent warping and damage from humidity in the greenhouse.
Conclusion
Building your own greenhouse shelves is an excellent DIY project that can significantly enhance your gardening experience. With the right materials and a bit of effort, you can create a functional and stylish shelving system that will serve you for years to come. Not only will you be able to keep your greenhouse organized, but you’ll also have the satisfaction of having built it yourself. Whether you’re starting a new greenhouse or looking to improve your existing setup, these shelves will help you maximize your space and keep your plants thriving.
Key Takeaways
- Use 1"x2" wood strips and shelf brackets for a simple shelving solution that can be customized to your needs.
- Measure carefully to avoid mistakes during construction; accurate measurements are crucial for a successful build.
- Regular maintenance will extend the life of your shelves and ensure they remain safe and functional.
- Choose quality materials that can withstand the greenhouse environment, and don’t skimp on safety measures.
- Consider the arrangement and spacing of your shelves for optimal light exposure and airflow for your plants.
Photos from this idea
Helpful products for this project
These products were matched to the materials, tools, and care steps discussed in the article.
- Wensilon(300pcs)#8×3/4”for Sheet Metal Self-Tapping Screws 410 Stainless Steel Truss Head High-Strength Quick Tapping Screws - View Product: MATERIAL: Made Of High Quality 410 Stainless Steel, Corrosion Resistant...
- Deck Plus 1-5/8 Inch Epoxy Coated Exterior Wood and Fence Screws #8 x 1-5/8" Torx/Star Drive Included Coarse Thread, Outdoor Rust Resistant Decking Screw, Tan, 5 lb Box, 735 Pieces | 48412 - View Product: Self-Drilling Point: Together, coarse screw threads and a self-drilling point...
- FASTENPOWER #8 X 5/8" Sheet Metal Screws Self Drilling Modified Truss Head Screws Zinc Coated Steel Self Tapping Sheet Metal Tek Screws, 100 Count - View Product: Durable strong steel sheet metal screws.
- 20 Pack Shelf Brackets 12 inches, Heavy Duty Black Iron Metal Floating Shelf Bracket, Rustic Farmhouse Decorative L Brackets for Shelves, Wall Mount Corner Brace for Wood Boards - View Product: ✔️【Fits 12 Inches Large Board】20 Pack 12" L x 8" H open shelf brackets will fit...
- BN-LINK Durable Seedling Heat Mat for Seed Starting 10" x 20.75", Waterproof Warming Mat Plant Heating Pad for Seed Germination, Indoor Growing, Hydroponic, Greenhouse, ETL Listed - View Product: IDEAL GERMINATION TEMPERATURE: The BN-LINK seedling heat mat helps maintain...
Source: Watch the original YouTube Short.
Keep exploring
Find more Junecity guides
Browse practical gardening, outdoor living, and DIY articles.Browse the blogKeep growing
Suggested reading

A Jamaican Favorite Is Blooming in Connecticut! 🇯🇲
Discover how to grow the delicious naseberry tree in Connecticut, embracing a piece of Jamaican culture right in your backyard. Learn about the unique conditions, care tips, and the joy of witnessing this tropical fruit bloom in northern climates.
Find the Clues. Win the Lemon Tree. 🍋
Join the Junecity.studio Treasure Hunt and learn how to care for your very own Meyer lemon seedling. Discover tips, tricks, and the best practices to grow and nurture this delightful citrus tree!
0 comments
Comments (0)
We love hearing from our community. Share your thoughts, questions, or experience.
Have something to add?
Log in to post, react, share images, and join threads.
Newest First
All Comments
Showing 0-0 of 0
Start the conversation.
Questions and first-hand experience are welcome here.