
I Connected Both Greenhouses to ONE Irrigation System 💧
Learn how to efficiently connect two greenhouses to a single irrigation system, saving time and ensuring your plants receive the watering they need. Discover the materials, steps, and tips for a successful setup.

Managing irrigation for multiple greenhouses can be a daunting task, especially when it comes to ensuring each plant receives adequate water. In this guide, we will explore how to connect two greenhouses to a single irrigation system, streamlining your watering process and promoting healthier plants. Follow these steps to set up your system effectively.
Why Connect Your Greenhouses?
Connecting your greenhouses to one irrigation system offers several benefits:
- Efficiency: Watering both greenhouses simultaneously saves time and reduces labor. This is particularly beneficial during peak growing seasons when time is of the essence.
- Consistency: A unified system ensures that all plants receive the same amount of water, preventing over or under-watering. Consistent moisture levels can lead to better growth and yield.
- Cost-Effectiveness: Reduces the need for multiple hoses and watering equipment, which can be costly and cumbersome to manage.
Materials Needed
Before starting, gather the following materials:
- ½-inch irrigation tubing (enough to cover the distance between the two greenhouses)
- Hose connectors (both male and female types to connect tubing ends)
- PVC pipe (if necessary for elevation or to navigate around obstacles)
- Drip emitters or adjustable spray nozzles (depending on the types of plants you are watering)
- Ground stakes to secure the tubing in place
- Pipe clamps or zip ties (for additional securing of the tubing)
- A hose bib or faucet adapter (to connect to your water source)
Steps to Connect Your Greenhouses
- Plan Your Layout: Assess the layout of your greenhouses and determine the best route for your irrigation line. Ensure the path is clear of obstacles such as benches or plants. Consider the elevation of the ground as this will affect water flow.
- Install the Main Line: Begin by laying down the ½-inch irrigation tubing from your water source to the first greenhouse. Use stakes to secure the tubing in place, making sure it follows a straight path as much as possible to reduce pressure loss.
- Connect to the First Greenhouse: Cut the tubing to the appropriate length and install hose connectors to attach it to the irrigation system in the first greenhouse. Ensure that the connection is tight to avoid any leaks.
- Extend to the Second Greenhouse: Continue the tubing from the first greenhouse to the second, ensuring a steady slope for proper water flow. If the second greenhouse is at a higher elevation, consider using PVC pipe to maintain water pressure.
- Install Emitters or Nozzles: Depending on your plant types, install drip emitters or adjustable spray nozzles at appropriate intervals along the tubing in both greenhouses. For drip irrigation, position the emitters close to the base of each plant to deliver water directly to the roots.
- Test the System: Turn on the water and check for leaks. Ensure that all plants are receiving adequate water. Observe how the water flows and adjust emitters if some areas appear to be over or under-watered.
Common Mistakes to Avoid
When setting up your irrigation system, keep these common pitfalls in mind:
- Incorrect Tubing Size: Ensure you are using the correct diameter tubing to match your water pressure and flow needs. Too small a diameter can restrict flow and lead to inadequate watering.
- Neglecting Water Pressure: Check your water pressure to ensure it can adequately supply both greenhouses. If your pressure is too low, consider installing a booster pump.
- Ignoring Plant Needs: Different plants may require different watering methods; adjust your emitters accordingly. For example, delicate seedlings may benefit from gentle misting, while established plants may need more direct watering.
- Skipping Regular Maintenance: Failing to regularly check your system can lead to clogs and leaks. Make it a habit to inspect your irrigation system at least once a month.
- Improper Emitter Placement: Ensure that emitters are placed correctly according to the root zones of your plants. Misplacement can lead to uneven watering and stressed plants.
Maintenance Tips
To keep your irrigation system functioning efficiently, perform regular maintenance:
- Check for clogs in emitters and clean them as needed. This may involve soaking them in vinegar or using a soft brush.
- Inspect tubing for leaks or damage and replace sections as necessary. Look for signs of wear, especially if the tubing is exposed to sunlight.
- Adjust watering schedules based on seasonal changes and plant growth stages. For instance, you may need to water more frequently during hot summer months and less during cooler periods.
- Flush the system periodically to remove any buildup of minerals or debris that may accumulate over time.
- Consider using a timer or smart irrigation controller to automate your watering schedule, ensuring that your plants receive consistent moisture without manual effort.
Conclusion
Connecting both greenhouses to a single irrigation system can greatly enhance your gardening experience. With careful planning and execution, you can create a system that meets the needs of all your plants while saving time and effort. By following the steps outlined in this guide and avoiding common pitfalls, you can establish an efficient watering routine that supports healthy plant growth. Happy gardening!
Photos from this idea
Helpful products for this project
These products were matched to the materials, tools, and care steps discussed in the article.
- HG Power 12 Inch Attic Fan with Thermostat, 971 CFM Shutter Exhaust Fan with Smart Temperature Humidity Controller, Wall Mounted Greenhouse Fan with EC Motor for Garage, Shed Ventilation, Black - View Product: Smart Thermostat: Equipped with a smart controller, our 12 inch exhaust fan with...
- GARDENA Retractable Garden Hose Reel - 50 Feet - Auto Retract Hose Reel with 180° Swivel Wall Mount - Heavy Duty - Includes Spray Nozzle - 20500 - View Product: Convenient watering: Give the 50 foot, high quality garden hose a short pull after...
- VEVOR Retractable Garden Hose Reel, 5/8 Inch x 100 ft Wall Mounted Hose Reel, Heavy Duty Garden Hose Reel with 9 Patterns Nozzle, Any Length Lock, Upgraded Slow Return System and 180°Swivel Bracket - View Product: Wide Coverage: With a 100 ft hose and 6 ft lead hose, this hose reel covers up to...
- SIGURANTA RV Winterize/Winterization Blowout Adapter - Brass with Ball Valve, 1/4" Male Quick Connect to 3/4" Male & Female GHT Garden Hose Thread - View Product: Product includes: Male & Female 2-Piece Set * 1, Leak-Proof Washers * 2...
- Metal Zip Ties,100 Pcs 11.8 Inch,304 Stainless Steel Zip Ties Multi-purpose Metal Cable Ties-Suitable for Outdoor Chain Link Fence and Exhaust Wrap Zip Ties - View Product: HIGH QUALITY: Our metal zip ties are made of high-quality 304 stainless steel...
Source: Watch the original YouTube Short.
Keep exploring
Find more Junecity guides
Browse practical gardening, outdoor living, and DIY articles.Browse the blogKeep growing
Suggested reading

A Jamaican Favorite Is Blooming in Connecticut! 🇯🇲
Discover how to grow the delicious naseberry tree in Connecticut, embracing a piece of Jamaican culture right in your backyard. Learn about the unique conditions, care tips, and the joy of witnessing this tropical fruit bloom in northern climates.
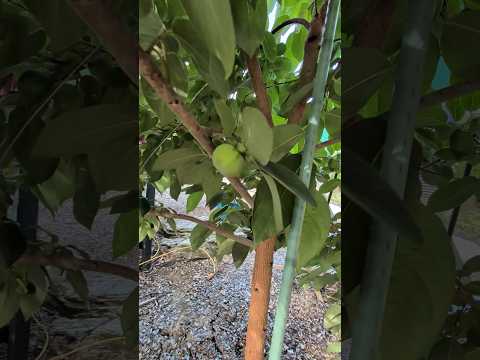
My Persimmon Tree FINALLY Produced! 👀
After three years of care, my persimmon tree has finally produced fruit! Join me as I share the journey, tips for growing persimmons, and what to expect as these fruits ripen in Connecticut.
0 comments
Comments (0)
We love hearing from our community. Share your thoughts, questions, or experience.
Have something to add?
Log in to post, react, share images, and join threads.
Newest First
All Comments
Showing 0-0 of 0
Start the conversation.
Questions and first-hand experience are welcome here.